Ok, I am not overly proud to say this but my entryway has never really been anything exciting since I moved into this house. It is not my favourite area, simply because it is wonky and doesn't flow, but I am getting out of my own head and I decided I needed to make the most of it (instead of ignoring it).
The floor tiles need to be replaced, but I am holding out for a budget friendly find at ReStore, which I have faith that I will eventually come across. But for now...I am controlling the controllable and taking the dark and uninspiring space and brightening it up and bringing it into this decade.
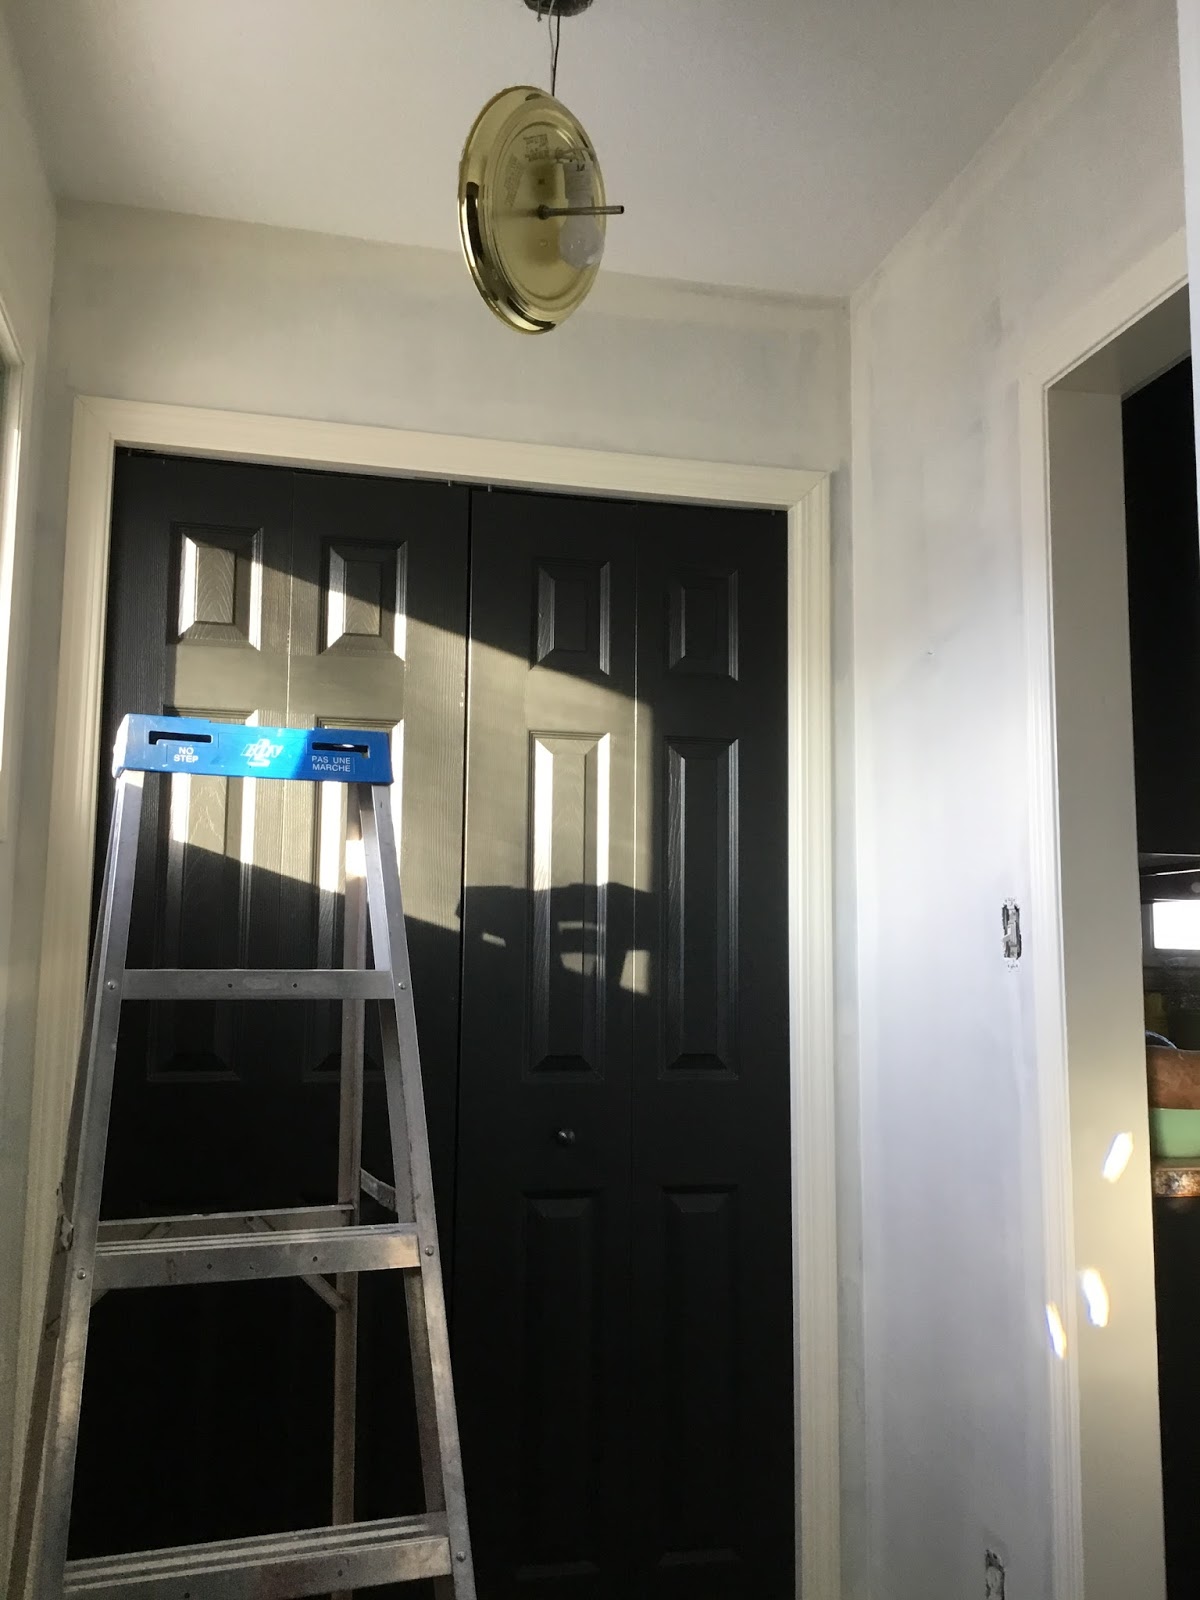
BEFORE: BLAH tan walls, white doors, and the infamous "boob" light. UGH...I loathe these light fixtures and slowly we are replacing them in this house.
And not sure WHY, but I always get so DAMN EXCITED that I forget to take proper BEFORE pics...what the what?? Anyhow....here is a bit of what it looked like after I already had kind of started disassembling and rippping the space apart.
At this point, I just had one side of the closet doors painted black and started working on the other side. Why the heck did I wait so long to paint them. They are GORGeous!! :-)

Now the fun begins...cutting in the white paint...which **GASP** I never thought I would be doing because I LOVE color, but I wanted to try white on white somewhere and this seemed like a great place to give it a go. I chose Behr Chenille Spread as it was a warm white that went perfectly with our trim color.

The first coat ALWAYS looks like crap. But, onwards and upwards! It took 3 coats to cover the dark tan and thankfully this was a small space.

I installed the light fixture and my hubby replaced the outlets and switches. WHAT a change!! This sweet little cage light came from Canadian Tire and was $40! How could you not love that?
Insert hot hubby helping with switch replacement. <3 <3
**CUE ANGELS SINGING** How is it that something so small makes such a HUGE difference?
DONE...now time to get the decorating for the holidays underway.
Enter some Buffalo Check and some vintage finds. The little MCM telephone bench I got at our town flea market for $5 this spring. It was covered in gold vinyl (the seat had a small hole) but I decided because fur is WAY more fun, so it shall be on this bench. I intended to do white fur, but they were all out at the fabric store. I have to say I think the black fur works here! I gave the bench a fresh coat of paint too, with my most
FAVOURITE GOLD paint ever!!
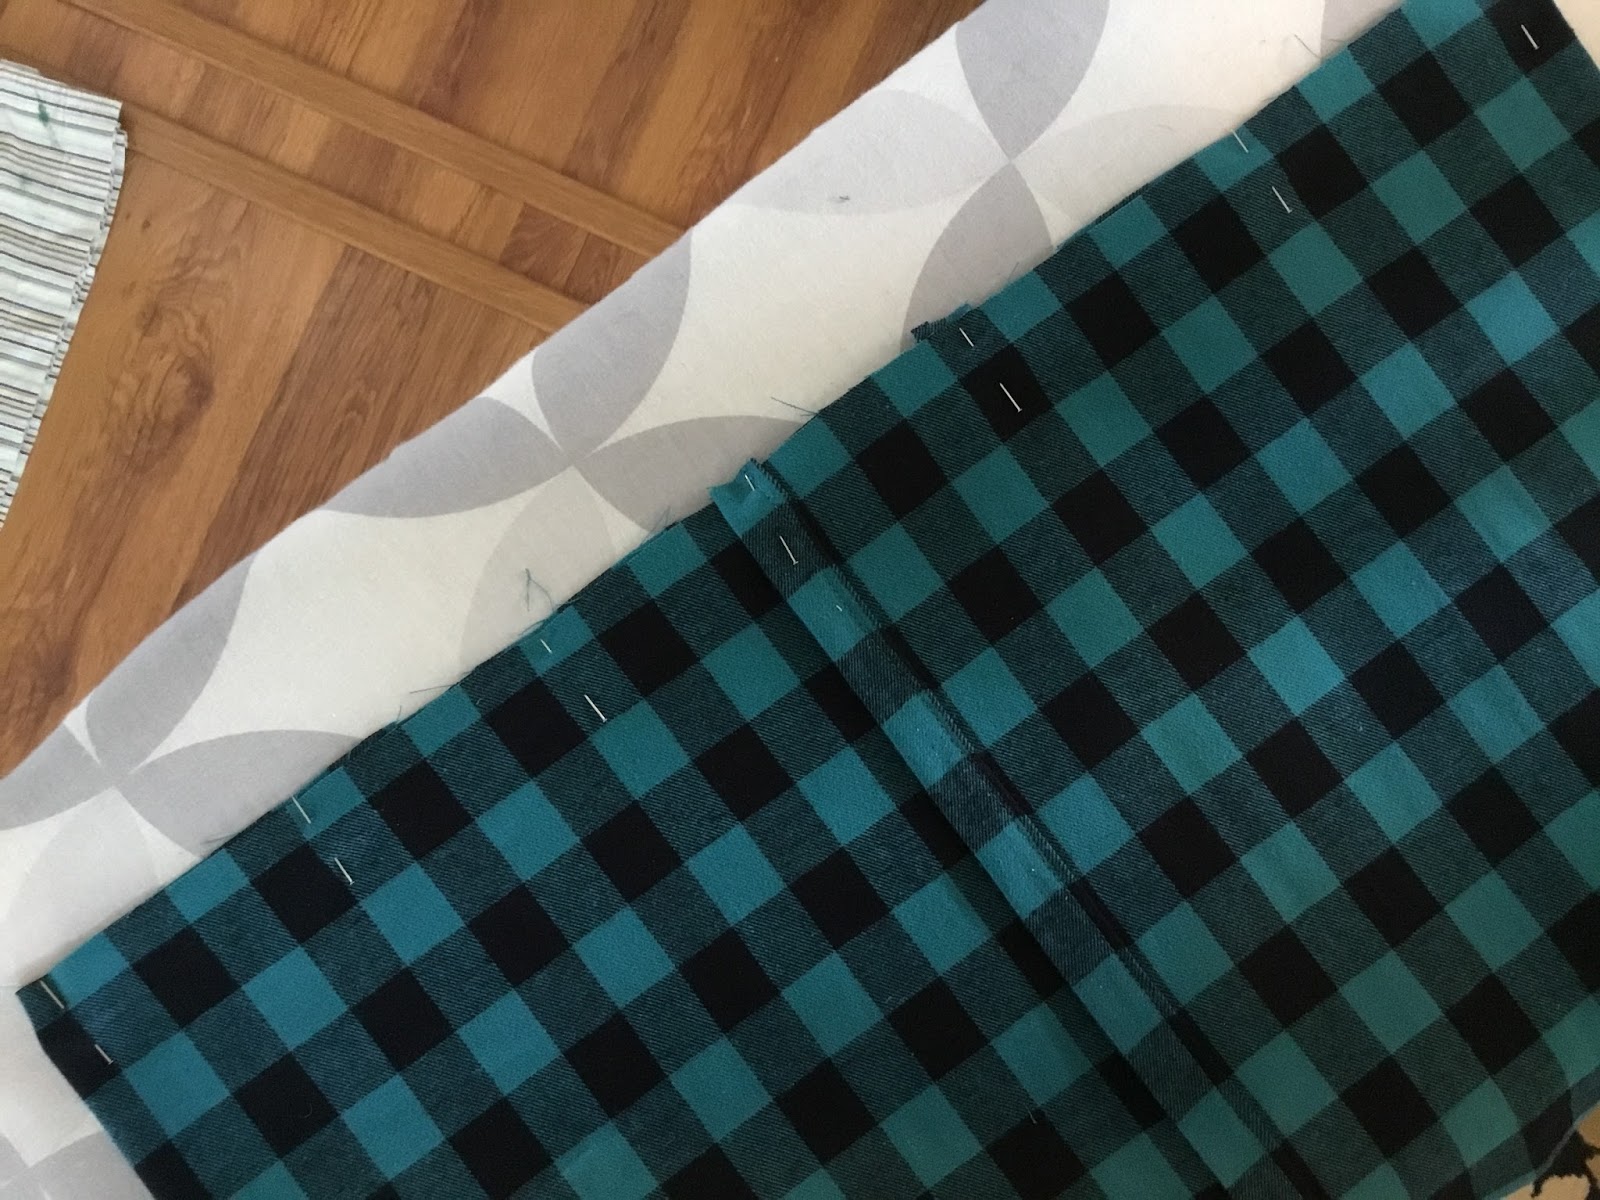
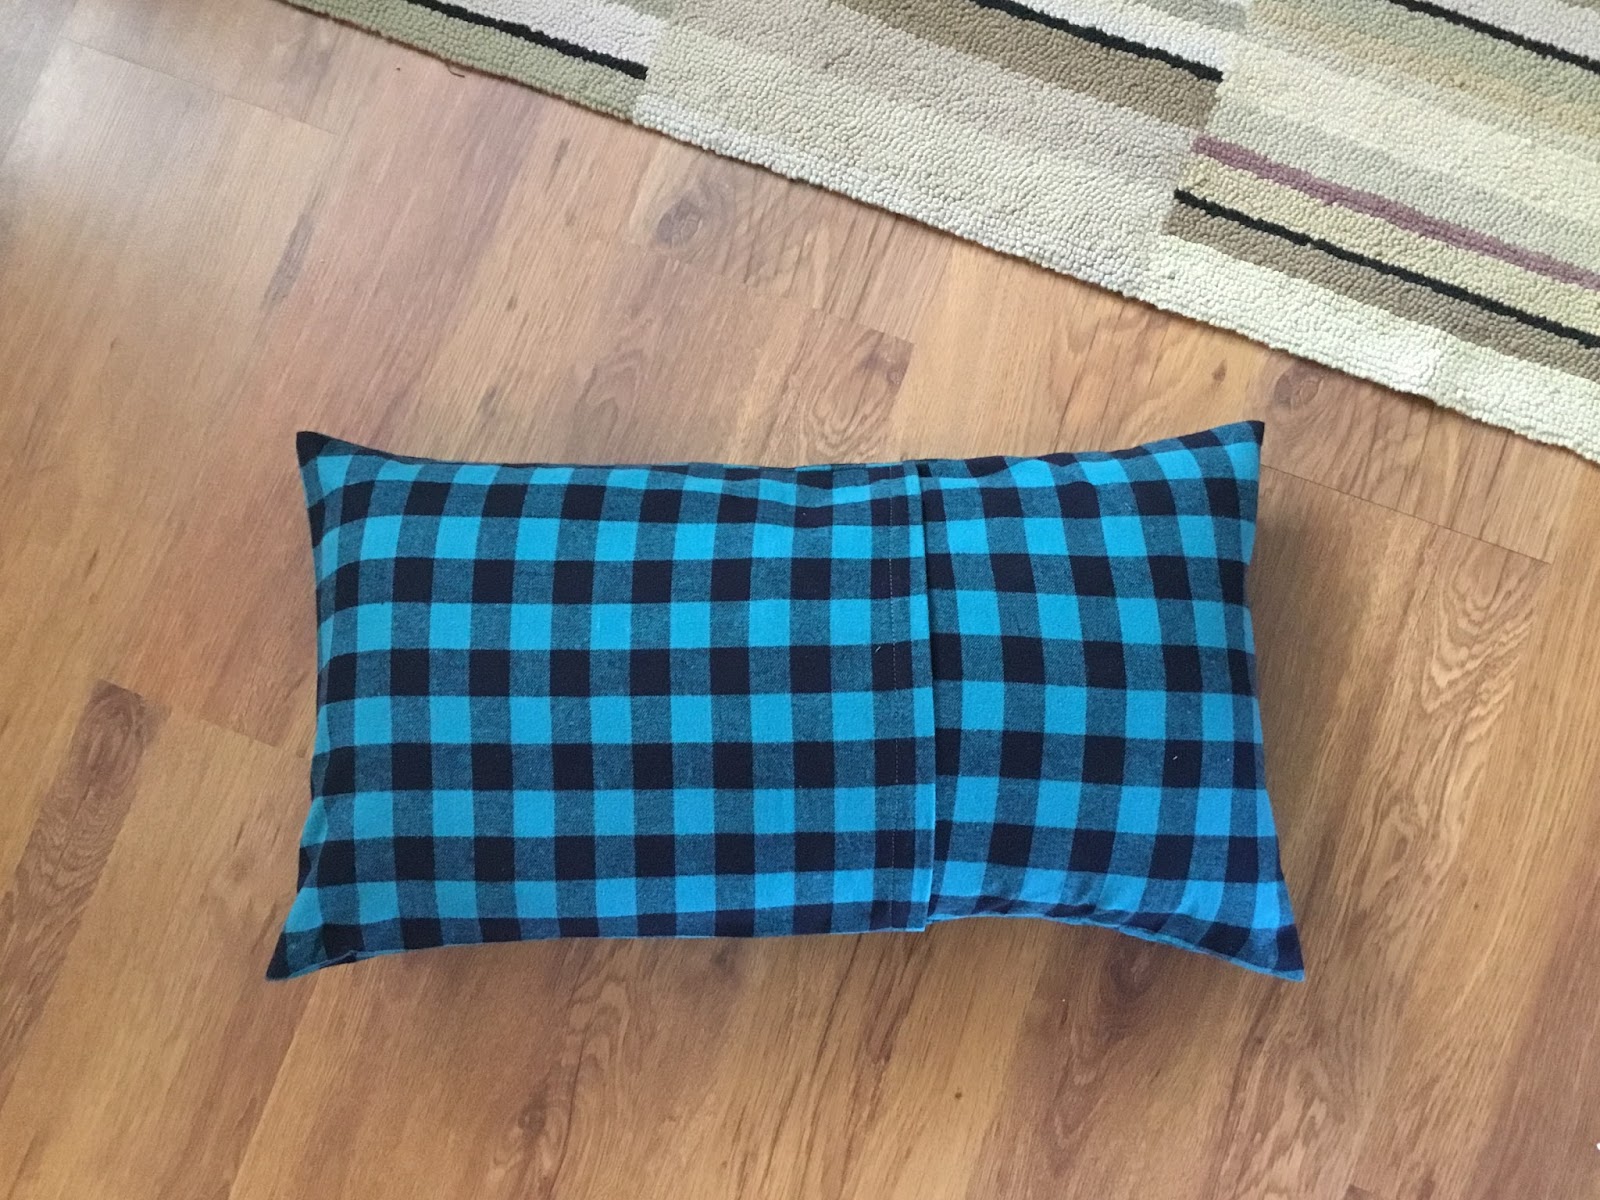
I also got some buffalo check fabric and made a quick envelope cover for one of my existing pillows.
I bought this swag last year and it seemed like this was a better spot for it. *SWOON*. So. Pretty! Here are a few pics of the rest of the holiday jewelry for the entry. I wanted it to be fun, simple and the buffalo check is my signature move...haha...and it ws a perfect fit here and contrast to the creamy white paint. I love the whole space and I'm happy it is complete! It didn't take that long and why the heck didn't I do this before?
This little sign came from the Dollar store, people. How awesome is this? ;-)
I grabbed a birch branch from my daughter's yard and hung it it the window with thin jute string from Michaels. I had these little gold, white and silver stars for years and thought they would be a cute and simple addition. I used sparkly gold string which also came from Michaels and was a great contrast to the natural birch branch.
Do you have a small entryway or space that you struggle with? I'd love to see pics or hear from you in comments below how you are jhuzzing (yes I say this is a word) up your space.
Stay weird ;-),
Wendy