Thursday, 27 June 2019

#SprayNewLife Vintage Stereo Upcycle

OK nothing and I mean NOTHING gets me as excited as when I find a piece of furniture that I know would KILL with a facelift.  This was one of them.  A $15 Facebook marketplace find and some elbow grease and voila!! I give you the newest addition to my living room!


I hunted for quite a while for one that had great lines.  I knew I wanted it to be white so with that in mind it had to have detail that popped.  This was it for me. Here is the before pic:


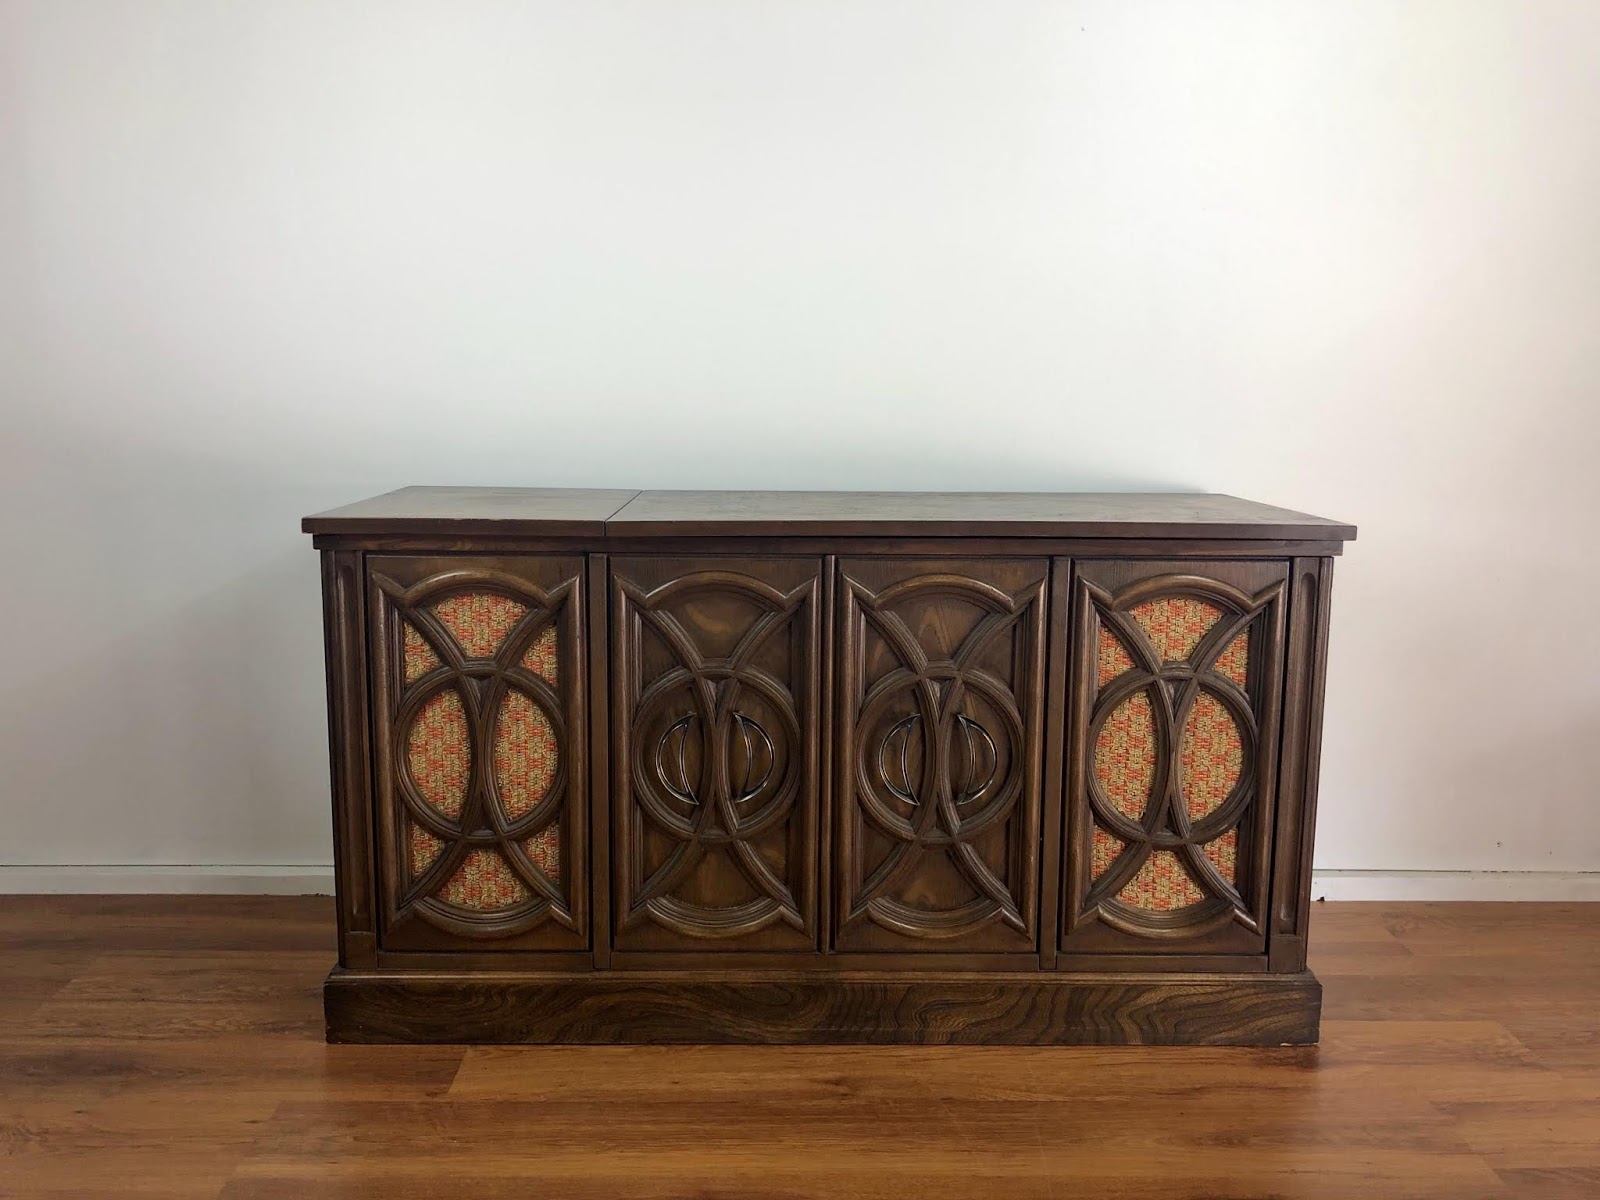
So when I was invited to participate in Rustoleum's #SprayNewLife campaign and contest, of course I said yes because spray paint makes everything better!  I knew the stereo would be the perfect piece for this campaign.  Just LOOK at those crescent moon handles.  Seriously gaga over here!

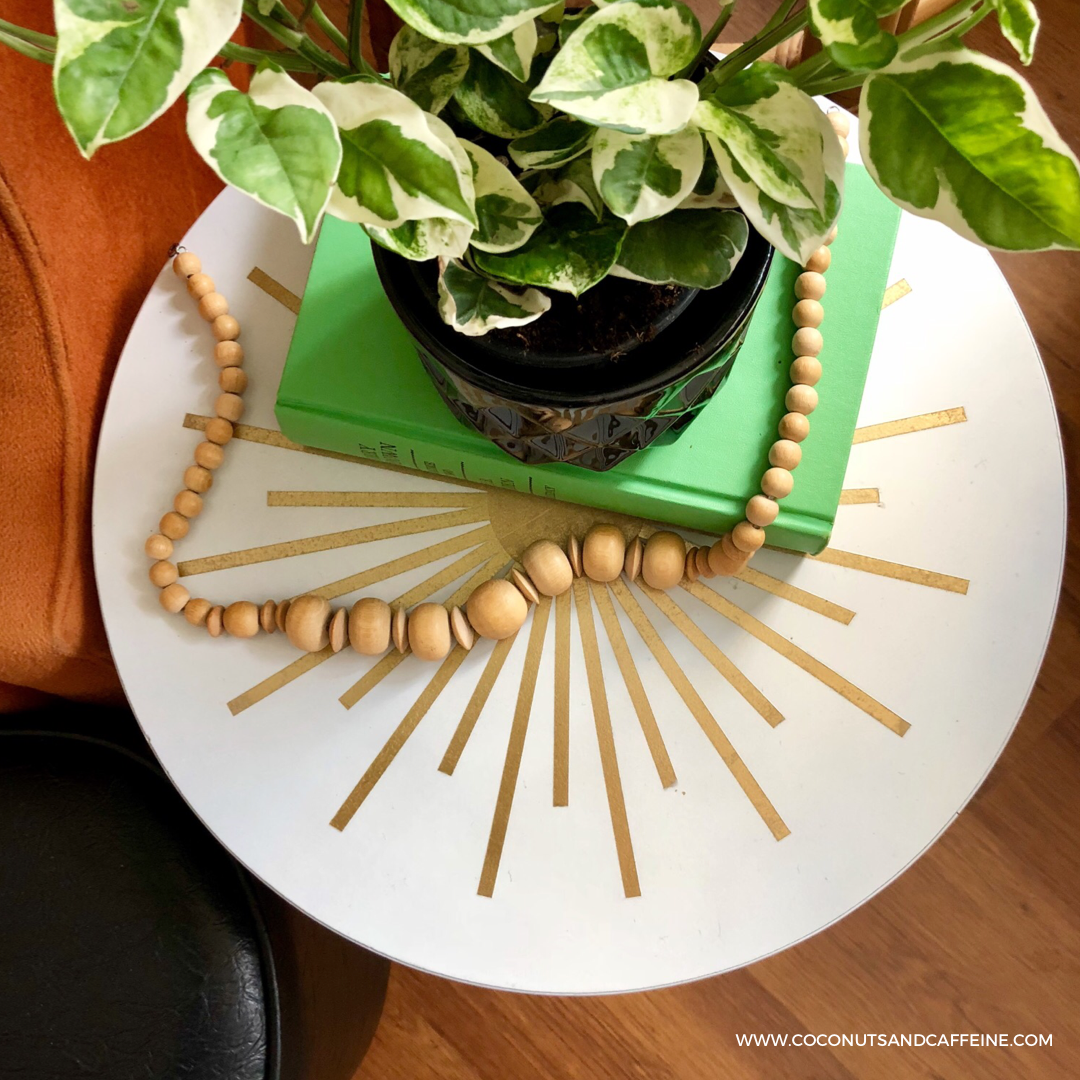
Here is a bit of a visual diary of the process but I am including all the steps below because maybe this inspired you to go hunting for a vintage piece that you can give new life to.

And because I know a zillion of your will ask, YES...I spray painted the fabric speaker covers.  I just unscrewed speakers from back and went to town.  It took a LOT of paint to cover the orange, but I kept adding layers til it covered.

The steps are listed below but check out my project and more right on the Rustoleum website here: Vintage Stereo Upcycle


Vintage Stereo Upcycle 
Difficulty Level: 1
Estimated Time: 3 days including dry time


List of Materials:


Rustolueum Painter’s Touch Ultra Coverage 2X Blossom White
Rustoleum Primer Painter’s Touch White
Rustoleum Metallic Gold
Drill & bits (to remove hardware and speakers)
220 grit sandpaper & sander
Tack cloth or rag
Mask for sanding


Do something great for the earth and your wallet!
Make something old new again and bring new life to a vintage stereo with a Rustoleum Painter’s Touch Ultra Coverage 2X.

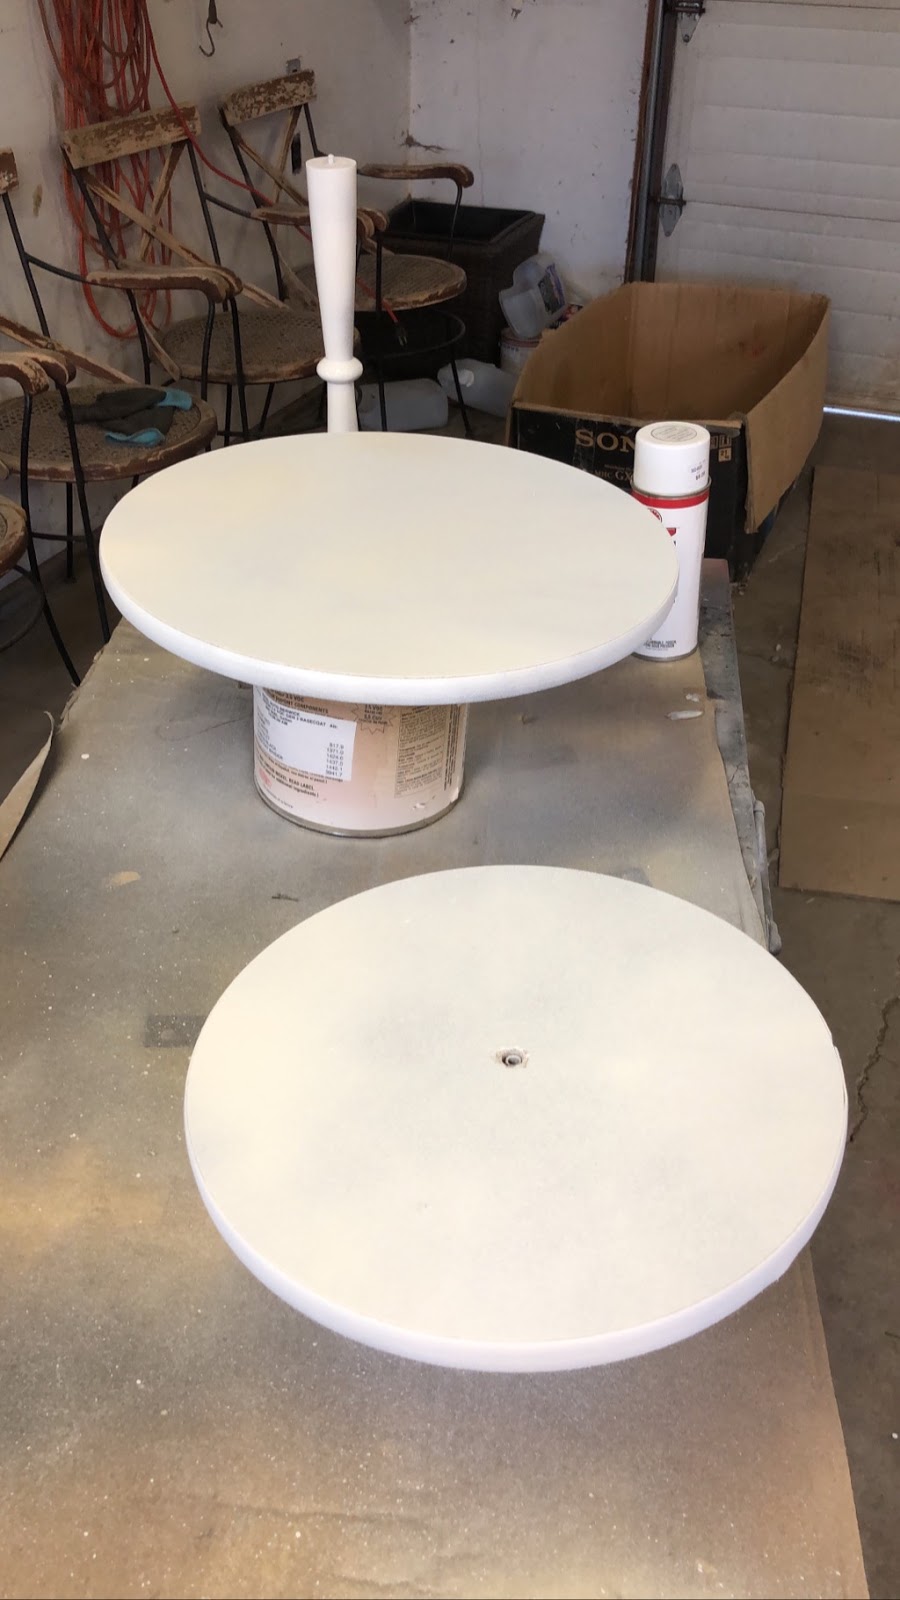
1. Prepare piece by sanding with fine grit (220) sandpaper. Remove any dust with a damp rag or tack cloth.
2. Remove hardware and speakers from the inside.
3.  Place stereo on drop cloth/cardboard on top of an old pallet. Keeping it raised up makes spraying around the bottom of the stereo easier.
4.  Shake primer can well then spray stereo using slow back and forth motions, slightly overlapping for even coverage. The primer allows better paint adhesion and a longer-lasting finish. Allow primer to dry for one hour or 48 hours before applying paint.
5.  Shake Painter’s Touch Ultra Cover 2X in White Blossom for one minute. Apply paint in the same manner as primer. Recoat within one hour or after 48 hours.
6.  Spray hardware colour of your choice. This project used Rust-Oleum Specialty Metallic Spray Paint in Gold.
7.  Allow project to dry at least 24 hours before handling and reassembling.
8.  Reassemble hardware and speakers inside stereo.

For more DIYs & inspiration, come on over & find me on Instagram here >>> COCONUTSANDCAFFEINE
SHARE:

Sunday, 3 February 2019

DIY ANTHROPOLOGIE INSPIRED STARBURST TABLE


TBH, I didn't even know I needed this in my life til randomly, while thrifting at Value Village, I found THIS:
THIS LIL GUY WAS $8.99! 

Not gonna lie...it really is nothing special but I saw it and knew I could McGyver it into something cool.  What that was, I didn't quite know. Haha! 

So whilst perusing Pinterest for ideas, I came across this table from Anthropologie.  ***CUE ANGELS SINGING!!!  THIS was my inspiration.


My little table is NOT wood on the top and bottom, but the pedestal portion was.  I was thinking about a faux wood finish then I rememebered a product from Valspar I saw one of my Instagram buddies using and I knew I was going to grab some to try out for myself.  This is what I used but we'll get more into that in a bit.

It was $18.99 at Lowe's (that's CAD so if you live in the US, you will get it cheaper).

Before I started in on anything I gave the table a good scrub because any kind of residue or dirt will affect how a coating goes on and adheres.  Then I gave it a light sand, wiped it down again and primed it with Kilz.  Normally I wouldn't prime but because the table is not wood, I wanted to do that extra step for a good tooth for the paint.


I then painted the pedestal and the base with Rustoleum Chalked in Linen White.  The top I painted with Rustoleum Metallics Gold.  I did 2 coats of both.


Once the paint was dried (I let mine cure overnight) I taped the gold part off with tiny automotive tape I grabbed from my son's tool pile (I totally eyeballed it for the most part) plus some painter's tape I had for the center part.  I measured in 1.5 inches from the edge and just pencil marked it. Then I started in by first taping the center circle, which I drew on by tracing a glass for the circle shape, then I taped on the entire start burst. Once again, I eyeballed placement.  Nothing crazy here!  LOL


Once I had the starburst all taped, I took the Rustoleum Linen White and sprayed the entire table top.  I gave it 2 coats, letting dry between coats. 

 Once it was dry, I peeled off the tape and VOILA!!  The beautiful gold shone through!! 

All the tape is OFF!!

I DIE!!!

Next I grabbed the Vaspar Antiquing wax and an old paint brush that had kind of scruffy edges, because I thought that would make better wood grain lines on the table.  I did one coat only and this stuff is thick but spreads on well, and you do have quite a bit of play time to go over it to make it look just how you want.  Then here is the thing...it takes 48 hours to cure so I left it in the garage for 2 days.  This was SO hard because I wanted it done!  :-))


When everything was dry, I sealed it all with a Spray Varathane, let it dry well, and then the next day screwed the table back together.  


I LOVE love how it turned out.  Considering the original is $398 and mine was $8.99, I would say I will take a little elbow grease, gold paint and antiquing wax any day!! 

Ethel (my MCM chair) needed a little table buddy and it was perfect beside her.  There is really nothing I enjoy more than taking something and bringing it a whole new life for next to nothing. 

I hope this inspires you to see the creative vision.  Sometimes the best things are hiding right in front of our face! 

Cheers,
Wendy


SHARE:

Sunday, 13 January 2019

DIY Painted Faux Tile


It all really started when I found this teensy blush pink coffee creamer and I painted my front door PINK!!  Then the idea snowballed to bring the color in to another part of my house, and my coffee station was on my mind for change and it was a perfect fit!!  I used the next color darker down on the paint chip from my front door, called Priceless Coral, from Behr.  It needed to pop just a bit more for me and it worked! 


I wanted to keep this project as budget friendly as possible and I am proud to say the total was under $30.00 for the can of paint. That's it! Here is a look at the before picture.  I LOVE my coffee station, but it was time to zhuzz it a bit and make it brighter!


I also needed a template for the hexagons so I had an idea to use the marker from Shift Shop, a fitness program I have done a few times in the past.  This was PERFECT!!  They were also flexible, making it perfect to trace the pattern on around the shelves!  I tried a few colors out, then I actually tested my idea out on a piece of foam board to make sure my brain and the final product matched up! 


I did buy a few different color testers out because I wanted to play, but ended up going with my first choice.  Isn't that always the way? 

After taping things off, I started in with painting one coat of white and coral then I needed to get pattern placement done. I just estimated where I figured the coral would be ending and then started.  I did a second coat of white, then mocked up the pattern on the coral, then the white.  I taped it off and the painted on the rest of coral.  Then I gave the coral a second coat. 


The next morning, I started in the center bottom and traced on the hexagon grid.  I used a white colored pencil, so the lines were just visible enough to see.  Of course, I was using white paint for the lines, so this was perfect.  I just used some of the white wall paint, and made sure to add drops of water to it to keep it flowing as needed. Latex paint thickens as it is exposed to air so this is important.  


After the grid was made, I then traced on the other lines inside the hexagons by using a ruler and the white colored pencil again.  

Then it was time to get to work!  It took most of the afternoon to paint all the lines because the angles were awkward and it was hard on the arms. But with copious amount of coffee and sheer determination, it got finished! I just used a small round brush I got at Michaels.  It was a LOT of linework, but to me it is therapeutic and I loved it actually. :-)


I shopped my house for all the decor because that kinda thing makes my budgeting soul VERY happy!  

SIDE NOTE:  I do have to pick up a teensy piece of moulding for the back of the station (there was caulking residue I just didn't remove properly) but that will only be a few dollars.  Overall, I am proud of how it turned out and LOVE the insane new vibe this side of my kitchen has now.  And most of all, I proved to myself that I could do this on such a small budget!  WOOP WOOP!! 


TIME LAPSE OF ENTIRE JOB:


SHARE:

Friday, 4 January 2019

Fluorescent Light Fixture Makeover


I am so excited to share this with you because I made a promise to myself that if I need to know how to do this, then others might appreciate my insight on how we tackled it as well!

We moved into our 1969 bungalow 11 years ago and for 11 years I looked at a truly retina-burning HUGGEEE fluorescent light fixture in our basement.  We didn't switch it out because it was actually inset into the ceiling, so that meant repairing a massive hole in the ceiling or finding a way around it and McGyvering it.  I opted to unleash my inner McGyver and this is the end result.


I will share the steps with you as my hubby and I join forces (I definitely needed extra hands to install this) to make a massive change in my Woman Cave Lounge.

Here is what the lovely gem looked like BEFORE...you may needs sunglasses.  Ohhh, my!


This was while I was getting ready to start my WCL reno.  And the moment I decided the nasty fixture needs to die.

 We ripped the old fixture out and started making plans for the new one. We measured the opening in the ceiling and built out a box to fit right back into the hole with 1/4" plywood. The frame is made of 1 x 2 pine. The frame fits the size of the hole and the plywood is attached to the top of the frame.


I wanted to do something that would easily give me a longer fixture length look but I didn't like anything in the stores.  I scoured Amazon and found these cute brass hanging sockets.  You can find them HERE and they are SUPER affordable which was important because, well, budgeting!!! :-)


I measured out the spots on the new box for light placement.  I decided on 3 hanging pendants because it filled the spot well. We drilled the holes for the wiring to go through. Also we predrilled holes on the frame to screw the fixture in the ceiling when it was time to install it. I used Rustoleum Chalked Spray paint in the color Charcoal to paint this out.  It was super easy to use and I love the finish it provides.  


Hubs mounted the lights on the new light box.  He did a great job! 

Hubs wired it in for me while I played foreman...just kidding, I totally helped, and then we installed it and screwed that bad boy up!  At this point I am beyond elated because it is looking DOPE!


I found these killer Amber Edison lightbulbs too which was by far the cheapest spot to get them.  I have since ordered more for other parts of my home.  They look SO great!! 

Once it was installed we added small trim around the outside, which I also sprayed with the Rustoleum Chalked Paint.  NOTE:  I usually am wearing pj's and Buffalo check flannel when I do my DIYs.  It's my signature move.  #lumberjackchic 


I think the total came to just over $100 for materials but when I compare the cost of ripping out the re-drywalling the downstairs, well...this was WAY more appealing!  I love how it turned out!! 


Thanks for stopping by! I realize that my next share needs to be WAY more detailed so bear with me as I settle into this process. 

**This blog contains affiliate links from which I earn a small commission. I never recommend anything unless I wholeheartedly stand behind it and believe in it.  It is of no additional cost to you. 
SHARE:
© WENDY KENNEDY. All rights reserved.
Blogger templates by pipdig